I’ve been a big fan of Travis for a while now. It runs the builds for most of my open source projects. However, recently I’ve been finding it a bit sluggish, and something fishy seems to have happened to my automated NPM deployments. So, I figured it was time to give some other CI services a go.
One I’m trying at the moment is Snap CI.
One thing that was really easy to do in Travis is running your tests in a number of different environments, using a build matrix. For example, if I wanted to run my JS tests on several versions of Node.js, I could put the following in my travis.yml:
language: node_js
node_js:
  - "0.12"
  - "0.10"
  - "iojs"
Simples.
Not so in Snap.
This is how I’ve done it, YMMV.
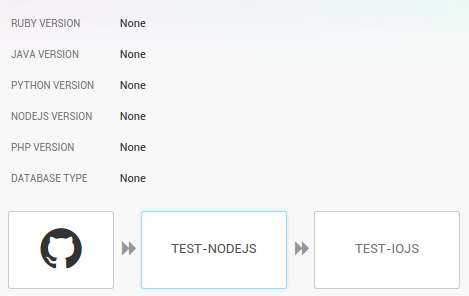
The basic idea is to have one stage in your pipeline per environment. For example, below I have one stage for node v0.12, and one for io.js v2.3.2.

It’s important to note that NODEJS VERSION is None. This version applies to all stages in the pipeline, and we don’t want that.
Since Snap exposes nvm (Node Version Manager), we can install whichever version we like in each stage, like so:
nvm install 0.12 2>/dev/null
nvm use 0.12
We can do this for each stage, but at some point we might want to put this into a script and version control it along with our code. Too much code in CI tools can be considered a smell, and we probably want to avoid this.
Now, a little script like this would do the trick:
# [repo]/scripts/install

#!/bin/sh

nvm install $1 2>/dev/null
nvm use $1
npm install
But, if you call the script using:
./scripts/install 0.12
you’ll get an error: ./scripts/install: line 4: nvm: command not found.
The solution is to call it like so:
bash -l ./scripts/install 0.12
Thanks to Akshay Karle from ThoughtWorks for helping me out with this. Shell scripting is not my forte!